/

Apollo

/

Apollo

Apollo

by Zan Laucius

Template Setup Guide

Updated May 10, 2026

Introduction

Thank you for purchasing the Apollo Template by Zan Creative.
This documentation is here to help you set up, customize, and get the most out of your new website.

Don’t have the template yet? Purchase it here.

Getting Started

To get starting customizing the template, you will want to replace the data in a few components. Go to the Assets panel and edit the following components

Dynamic Title

Replace the text layers within the Stack in Variant 1.

NavBar

Within the Name Stack, replace both Text layers with your name.


Home

Within the Layers panel, find and replace the following content:

ProfileImage

Replace the component image property with your own profile image.

ImagesTicker

Replace the image properties for PreviewCard1-4, found on the left side of the page. You will also need to replace the images for Preview1-Mobile - Preview4-Mobile with the same images.
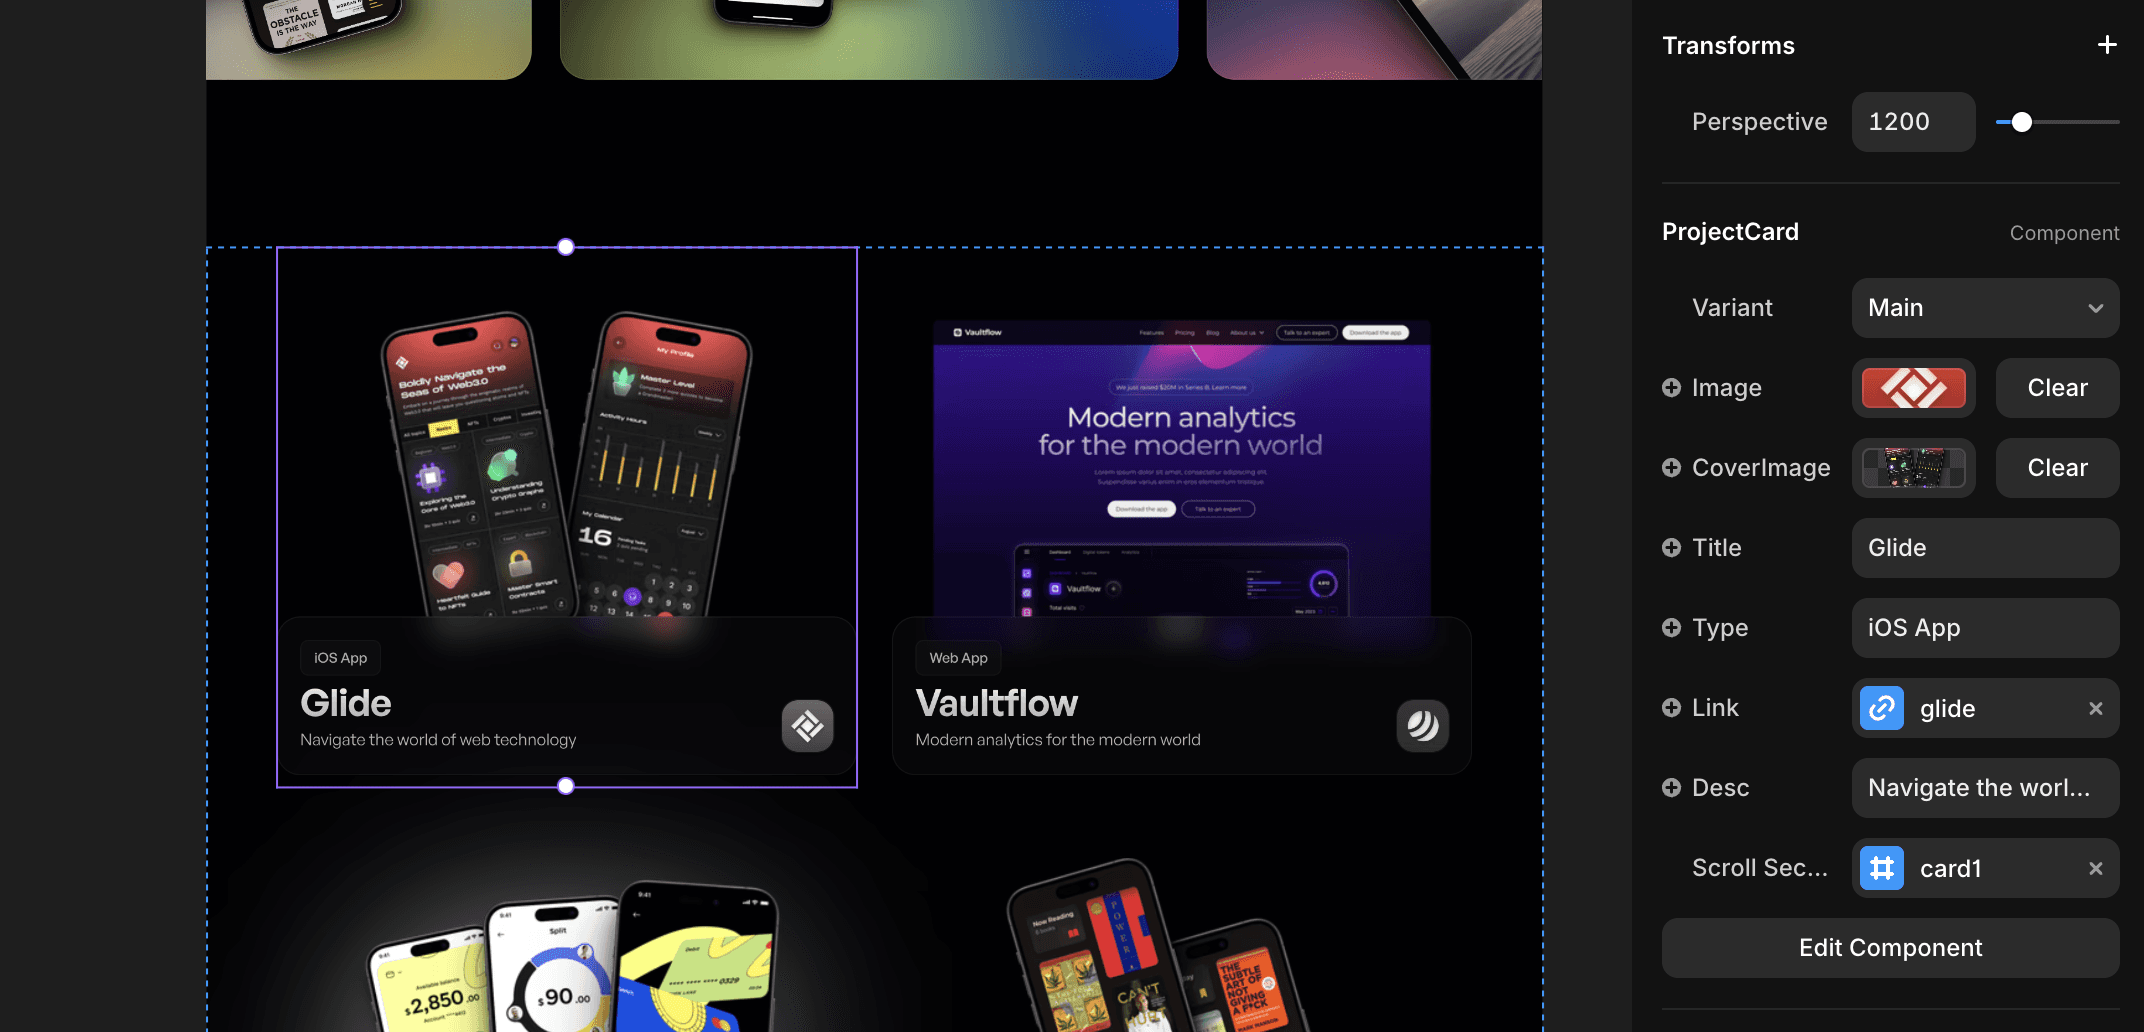
ProjectGrid

For each ProjectCard within Project Grid, you will need to replace the existing data for each component. The cards will look the best with a transparent PNG image used to display a preview of each project.

Tip: Use the website shots.so to easily generate mockups with a transparent background.

EmailCopy

Replace the email within the Email property of EmailCopy and EmailCopyMini.

ResumeDownloadButton

Replace the File property within the ResumeDownloadButton component to add download functionality for any file you'd like.

BottomGraphic

Within the GetInTouchSection, go to BottomGraphic and replace the image.

Footer

To customize the Footer, change the properties for each of the icons as well as the copyright property.

Projects (CMS)

To customize each Project CMS page, edit the data within the CMS collection.

AltLayout

After uploading your images and editing the text sections, try turning AltLayout to Yes and No to see which layout looks best for each page. This layout will change the location of certain images on the page.

Background

Edit the CMS field titled BackgroundTint to change which night sky background is shown.

You'll notice that for each CMS project, only one Layer with the prefix "Sky-" will be visible. Each layer will only be visible if the BackgroundTint field matches the condition set for each of these layers.

TechStack Icons

To specify which icons are showing in the TechStack component, fill in the Icons field with the names of the icons you'd like to show. Make sure to add a "," after each icon name within the field.

Frequently asked questions.

What's included in my purchase?

- A Framer template link ready to add to your account - Free template setup guide to help you get started - Email support for setup and customization questions - 3 months of free Framer Pro included

How do Framer templates work?

After purchase you'll receive a template link that adds directly to your Framer account. From there, everything is editable — swap in your content, adjust colors and fonts, and launch. No coding required.

Do I need design or coding experience?

None. If you can click and type, you can customize your template and launch your site.

Do I need a Framer subscription?

You can get started on Framer's free plan. To connect a custom domain you'll need a Pro subscription — though your purchase includes 3 months of Framer Pro to get you started.

What happens after I purchase?

You’ll be redirected to add the template to your Framer account immediately. You’ll also receive an email confirmation with access details.

How long does setup take?

Most people are live within a day or two. The setup guides walk you through everything step by step so there's no guesswork.

Do you offer support?

Yes — real email support, not a bot. If you get stuck on setup or customization, reach out and I'll help you sort it out.

What's your refund policy?

All sales are final on digital products. If you have questions before purchasing, feel free to reach out via email — I'm happy to help you figure out if a template is the right fit. And if something isn't working as expected after purchase, email me and I'll make it right.